Monster Eye Balls Rice Krispie Bites Recipe
Monster Eye Balls Rice Krispie Bites are not just for Halloween, though they certainly fit right in with spooky season. These are the kind of treats that make kids (and adults!) giggle when they see them. They have that satisfyingly chewy, gooey texture that everyone loves in a Rice Krispie treat, but with a fun, monstrous twist that makes them visually exciting. The real magic happens with the coloring and those candy eyes – they transform a simple cereal treat into something wonderfully weird. We’re aiming for that perfect balance of sweet, a little bit salty from the butter, and delightfully squishy. It’s a simple recipe that delivers big on fun and creepy-crawly appeal, perfect for parties or just a fun afternoon project with the little monsters in your life.
Making the Monster Base
The foundation of our monster bites is a good old-fashioned Rice Krispie treat. You want to make sure you melt the butter and marshmallows completely to get that nice, sticky binder that holds everything together. Overheating can make the treats tough, so keep an eye on it. Using salted butter adds a nice subtle flavor contrast to the sweetness of the marshmallows. When measuring your cereal, it’s best to gently spoon it into the measuring cup and level it off rather than scooping directly from the box, which can compact it and lead to too much cereal for the binder. This ensures your bites have the perfect ratio of crispy to gooey.
Coloring the Monster Flesh
This is where the fun really begins and the monster transformation takes place. We’ll be dividing the mixture to create different colored monster eyeballs. For the best color distribution, it’s important to work quickly before the marshmallow mixture cools and starts to set. Use gel food coloring for the most intense and true colors without adding too much liquid, which can make the treats greasy. Start with a small amount of coloring; you can always add more. Divide your marshmallow mixture into separate bowls, one for each color you want to create. Add your desired food coloring to each bowl and stir thoroughly until the color is uniform. You’ll want a good, even spread of color throughout the entire batch. Think greens, purples, grays, or even a mix of muddy colors for a truly monstrous look. Gentle mixing is key here to avoid breaking down the cereal too much.
Shaping the Eyeballs
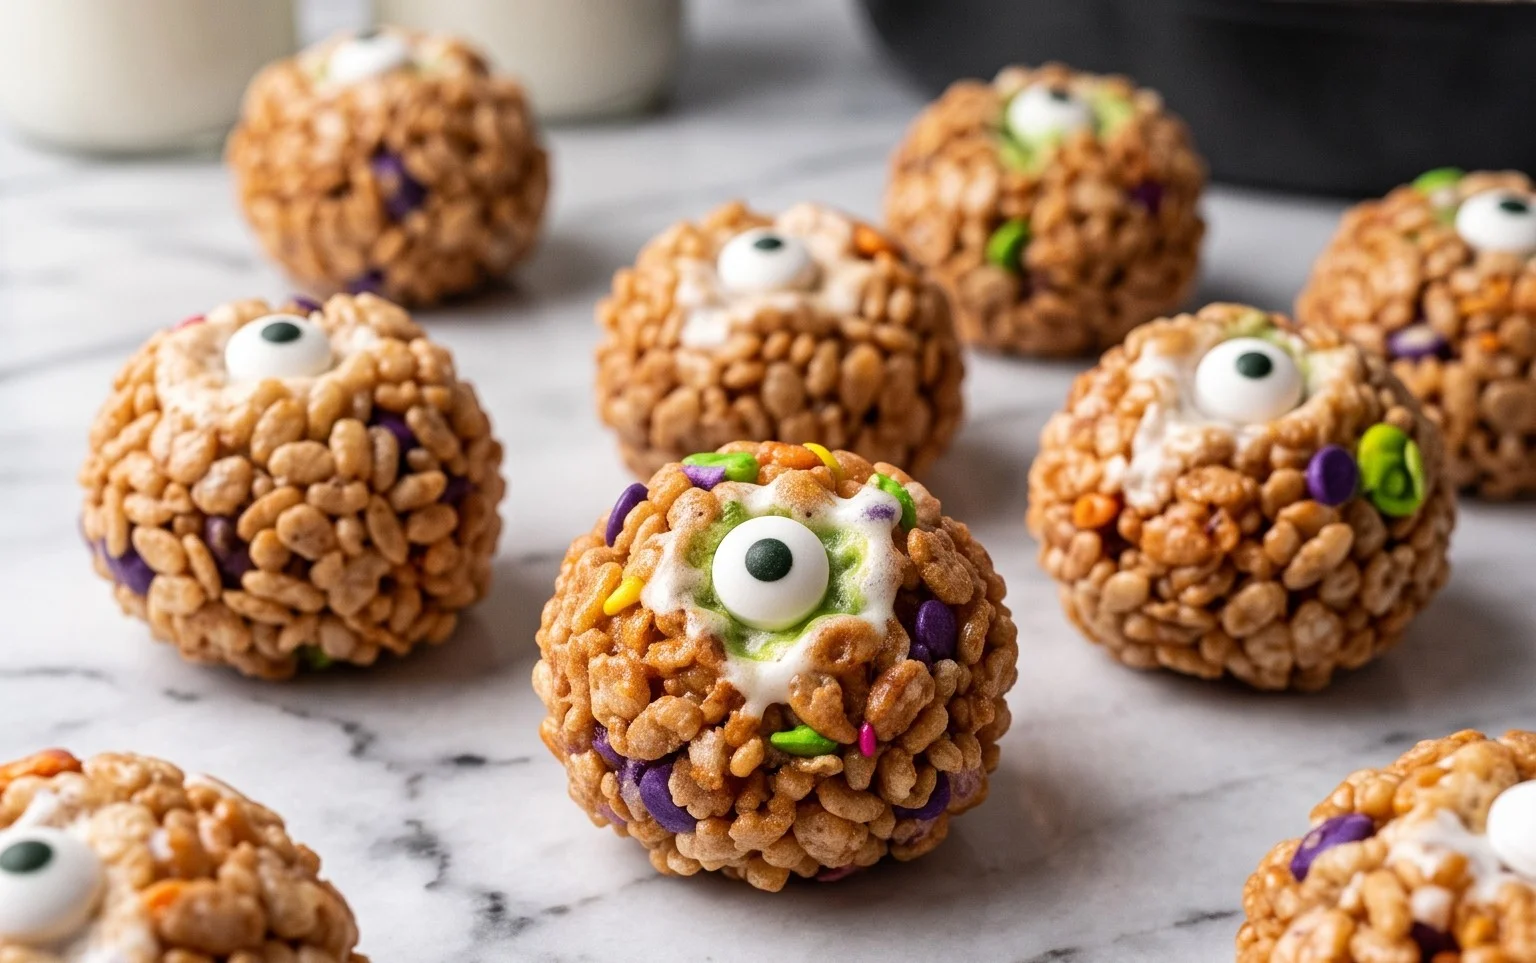
Once your mixture is colored, it’s time to shape the eyeballs. While the mixture is still warm enough to be pliable but not so hot that you burn your fingers, grease your hands with a little butter or cooking spray. This prevents the sticky mixture from clinging to your hands. Scoop out portions of the colored Rice Krispie mixture. The size is up to you – I like to make them about 1.5 to 2 inches in diameter, roughly the size of a golf ball, so they’re easy to handle. Roll each portion into a ball. As you roll each ball, immediately press two large Wilton candy eyes into the sides to resemble a bulging eyeball. Work in batches, shaping and adding eyes before the mixture cools down too much. If it gets too hard to work with, you can gently re-warm it for a few seconds in the microwave, but be careful not to melt it completely. The goal is a firm but still slightly soft texture that holds its shape.
Finishing Touches and Storage
Let the Monster Eye Balls Rice Krispie Bites cool completely on wax paper or parchment paper. This usually takes about 30 minutes to an hour, depending on the room temperature. Once they are firm, they are ready to be served. If you want to add extra spooky details, you could use a bit of black edible marker to draw tiny pupils off-center or add a few red edible veins with a small brush and some diluted red food coloring after they’ve set. Store any leftover monster bites in an airtight container at room temperature. They will stay fresh for about 3 to 4 days. Avoid refrigerating them, as this can make them hard and less chewy. These treats are best enjoyed at room temperature.
Monster Eye Balls Rice Krispie Bites
These Monster Eye Balls are surprisingly simple to make, making them a fun and spooky treat for Halloween or any monster-themed party. The key is getting the right texture so they’re chewy and hold their shape, and adding just enough color to make them look truly monstrous. We’re using classic Rice Krispie treats as our base, but with a few eerie twists.
Ingredients:
- 6 cups Kellogg’s Rice Krispies Cereal
- 6 tablespoons Butter (We use Salted, Sweet Cream Butter)
- 6 cups Mini Marshmallows
- Wilton Color Right Food Coloring System
- 33 Wilton Candy Eyes – Large
Making the Monster Base
The foundation of our monster bites is a good old-fashioned Rice Krispie treat. You want to make sure you melt the butter and marshmallows completely to get that nice, sticky binder that holds everything together. Overheating can make the treats tough, so keep an eye on it. Using salted butter adds a nice subtle flavor contrast to the sweetness of the marshmallows. When measuring your cereal, it’s best to gently spoon it into the measuring cup and level it off rather than scooping directly from the box, which can compact it and lead to too much cereal for the binder. This ensures your bites have the perfect ratio of crispy to gooey.
Coloring the Monster Flesh
This is where the fun really begins and the monster transformation takes place. We’ll be dividing the mixture to create different colored monster eyeballs. For the best color distribution, it’s important to work quickly once the marshmallows are melted. The Wilton Color Right system is fantastic because it uses highly concentrated liquid colors. You only need a few drops at a time. Start with a small amount, stir it in thoroughly, and then add more if you want a deeper shade.
For spooky monster eyes, I like to make a few different colors. A pale green, a sickly yellow, and a deep purple or even a charcoal grey work really well. You can also do a blood red, but for the “eyeball” effect, paler, more unusual colors tend to stand out more as monstrous. Remember that the color will lighten slightly as the cereal is mixed in. It’s also a good idea to grease your hands or use a silicone spatula to mix the color into the marshmallow mixture to prevent sticking. Don’t be afraid to experiment with mixing colors to create unique monster hues. For example, a tiny bit of black added to green can give you a great slime-like color.
Forming the Eyeballs
Once you have your colored marshmallow mixture ready, it’s time to combine it with the cereal. You’ll want to divide the 6 cups of Rice Krispies cereal among your different colored marshmallow batches. For example, if you’re making three colors, you’d divide the cereal into three portions, roughly 2 cups per color. Gently fold the cereal into the colored marshmallow mixture using a large greased spatula or your greased hands. The goal is to coat the cereal evenly without crushing the Rice Krispies too much. Work quickly, as the mixture will start to set.
To form the “eyeballs,” you’ll be creating small, round balls. The easiest way to do this is to lightly grease your hands with butter or cooking spray. Then, take about a 1.5 to 2-inch scoop of the mixture and gently roll it between your palms to form a ball. Don’t pack them too tightly, or they will be very hard. You want them to be firm enough to hold their shape but still have a pleasant chew. As you form each ball, immediately place it on a sheet of parchment or wax paper that you’ve laid out on a baking sheet or clean countertop. This prevents them from sticking to your work surface.
Attaching the Monster Eyes
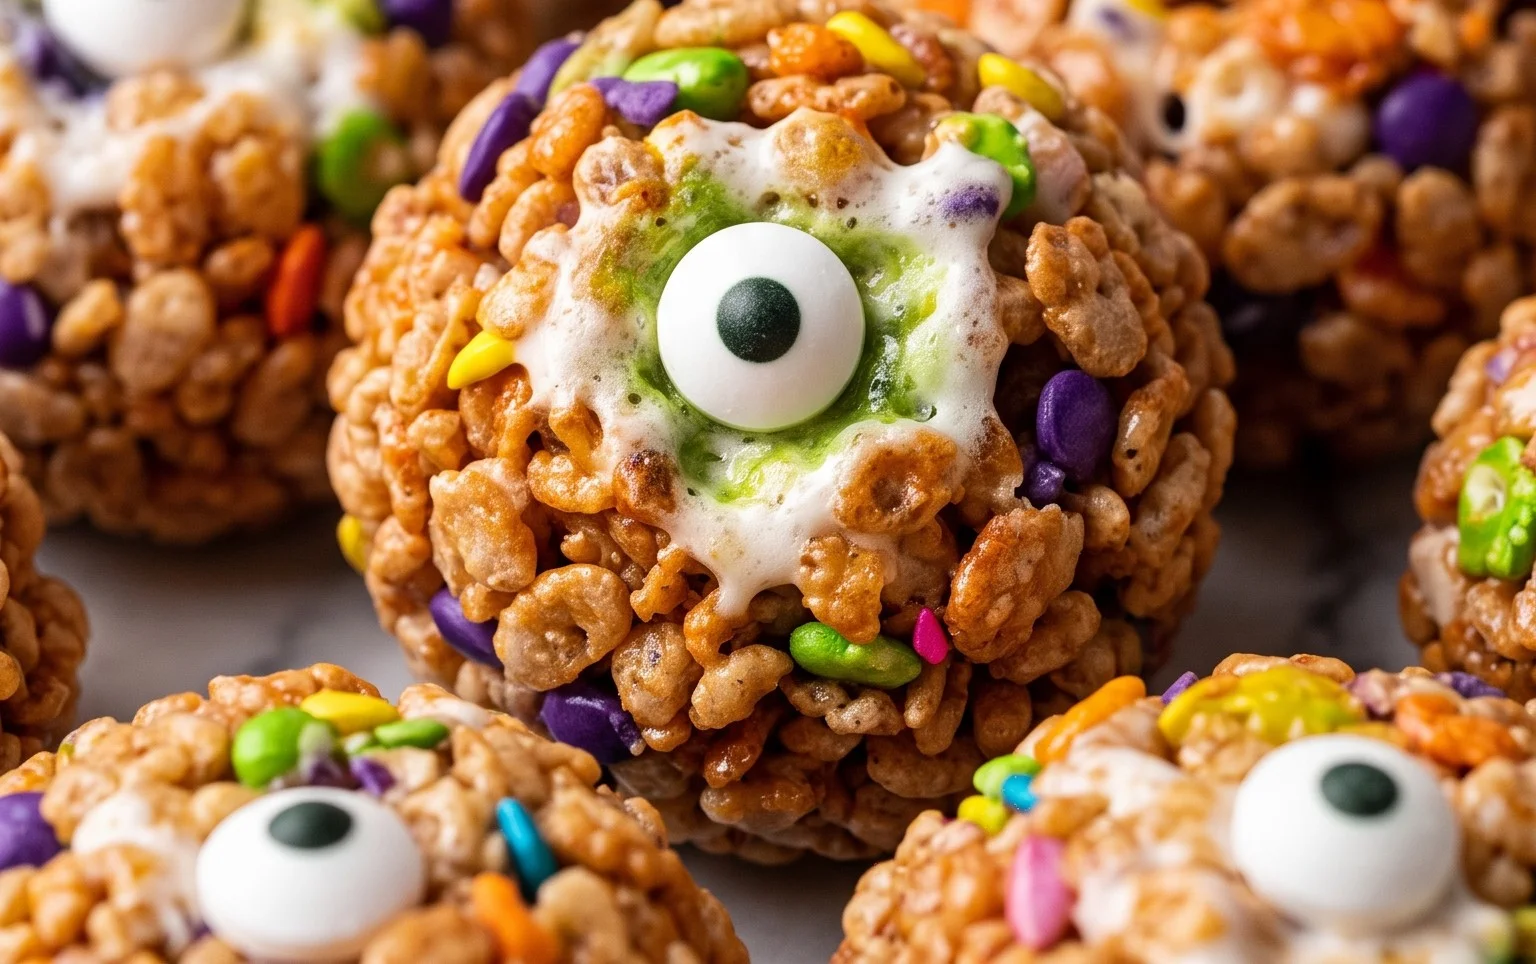
This is the final, and arguably the most important, step in making these truly look like monster eyeballs. While the formed Rice Krispie balls are still slightly warm and sticky (this is key for adhesion), take one of the Wilton Large Candy Eyes and gently press it into the surface of the eyeball. You can press it just enough so it adheres securely. Some of the marshmallow mixture might ooze slightly around the eye, which actually adds to the spooky, organic look.
If your Rice Krispie mixture starts to get too hard to work with, you can gently rewarm it in the microwave for about 10-15 seconds, stirring well, but be very careful not to melt it completely again, as this can make them greasy. You can also use a little bit of water on your hands to help smooth out any rough edges of the eyeball before attaching the candy eye. For a more varied look, you can place the candy eyes slightly off-center or even use two smaller eyes on one eyeball if you have them. Just be sure to press them in firmly so they don’t fall off later.
Allow the monster eyeballs to cool completely and set. This usually takes about 30 minutes to an hour, depending on the room temperature. Once they are firm, they are ready to be served. These are best enjoyed within a day or two of making them, as Rice Krispie treats can become a bit stale over time. Storing them in an airtight container at room temperature is ideal. You can also place them in individual cellophane bags for party favors.
Conclusion:
There you have it – your very own batch of Monster Eye Balls Rice Krispie Bites! These treats are a guaranteed hit, offering that classic, comforting Rice Krispie texture with a fun, spooky makeover that’s perfect for Halloween parties, monster-themed birthdays, or just a fun activity to do with kids. They’re surprisingly easy to make, don’t require any baking, and the visual appeal is fantastic. Plus, you can customize the colors to match any monster theme you can imagine. Don’t be afraid to get creative with your colors and maybe even add some extra edible details for more ghastly effects.
Serving Suggestions:
Serve these monster eyeballs on a platter for a spooky spread, or package them individually for party favors. They pair wonderfully with other Halloween treats like ghost cookies or witch finger pretzels.
Variations:
For a slime effect, try swirling two colors together before shaping. You could also use different sizes of candy eyes for a more varied look, or even pipe on some extra creepy details with edible icing. Add a few sprinkles to the mixture before it sets for a textured effect.
Encouragement to Try:
Give these Monster Eye Balls Rice Krispie Bites a go! They’re a simple, no-bake way to bring some monstrous fun to your next celebration. You’ll be amazed at how simple they are and how much joy they bring.
Frequently Asked Questions:
Can I make these ahead of time?
Yes, absolutely! These monster bites can be made up to 2 days in advance. Store them in an airtight container at room temperature to keep them chewy. Just make sure they are completely cooled before storing.
My Rice Krispie treats are too hard. What did I do wrong?
This usually happens if the marshmallows and butter were overheated, or if too much cereal was added. Be careful not to cook the marshmallow mixture too long, and measure your cereal gently, spooning it into the cup rather than scooping directly, to avoid compacting it.
Can I use different candies for the eyes?
While candy eyes are the most convenient and give the best look, you could technically use small rounds of white fondant with black dots for pupils, or even carefully piped icing if you’re feeling artistic. However, candy eyes are highly recommended for ease and appearance.
Monster Eye Balls Rice Krispie Bites
Spooky and fun no-bake treats perfect for Halloween parties, featuring vibrant colors and creepy candy eyes.
Ingredients
-
6 cups Kellogg’s Rice Krispies Cereal
-
6 tablespoons Salted, Sweet Cream Butter
-
6 cups Mini Marshmallows
-
Wilton Color Right Food Coloring System
-
33 Wilton Candy Eyes – Large
Instructions
-
Step 1
Grease a 9×13 inch baking pan. -
Step 2
In a large microwave-safe bowl, combine the butter and mini marshmallows. Microwave on high for 2 minutes, stirring after 1 minute. Continue microwaving in 30-second intervals until completely melted and smooth. -
Step 3
Add your desired food coloring from the Wilton Color Right Food Coloring System to the melted marshmallow mixture and stir until evenly colored. For spooky monster eyes, consider green, purple, or orange. -
Step 4
Add the Kellogg’s Rice Krispies Cereal to the colored marshmallow mixture. Stir until well coated. -
Step 5
With lightly greased hands, shape the mixture into balls, about 1.5 to 2 inches in diameter, resembling eye balls. Place on the prepared baking pan. -
Step 6
Press 2-3 Wilton Candy Eyes – Large onto each “eye ball” before it cools completely. Allow to set for at least 30 minutes.
Important Information
Nutrition Facts (Per Serving)
It is important to consider this information as approximate and not to use it as definitive health advice.
Allergy Information
Please check ingredients for potential allergens and consult a health professional if in doubt.