Fluffy Homemade Yeast Doughnuts – Easy Recipe
Perfect yeast doughnuts are more than just a breakfast treat; they’re a nostalgic journey, a fluffy cloud of pure comfort, and a canvas for your wildest sweet tooth dreams. Who can resist that irresistible aroma wafting from the kitchen, promising a soft, airy interior encased in a slightly crisp, golden-brown exterior? There’s a certain magic in a homemade doughnut, a satisfaction that store-bought simply can’t replicate. It’s the delicate balance of sweetness and yeast, the pillowy texture that melts in your mouth, and the sheer joy of customizing them with your favorite glazes and toppings. Whether you’re a seasoned baker or a complete beginner, mastering the art of perfect yeast doughnuts will unlock a new level of culinary delight. Get ready to impress yourself and everyone you know with this foolproof recipe.
Perfect Yeast Doughnuts
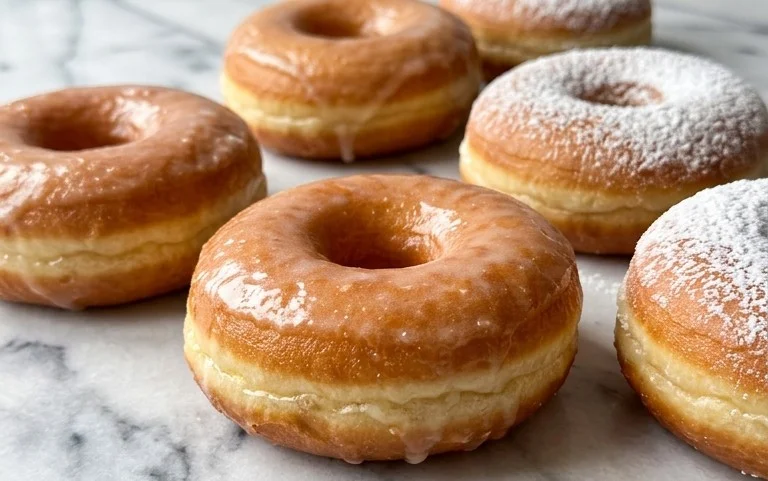
There’s something truly magical about a warm, fluffy yeast doughnut, straight from the fryer and coated in sweet glaze or a dusting of sugar. Forget those dry, store-bought imposters – making perfect yeast doughnuts at home is surprisingly achievable, and the reward is exponentially higher. This recipe will guide you through every step, ensuring you create a batch that will disappear in minutes. We’re aiming for that ideal balance of tender crumb, airy lightness, and a delicate crust that gives way to pure deliciousness. Get ready to impress yourself and everyone lucky enough to share your creations.
Ingredients:
- 6 Tbsp water (lukewarm)
- 5 oz buttermilk (at room temperature)
- 1 egg (at room temperature)
- 2 oz butter (melted)
- 16 oz all-purpose flour ((or bread flour))
- 2 oz sugar
- 1 tsp salt
- 1 ½ tsp quick-rise yeast ((or regular dried yeast) )
- 16 oz olive oil (for frying)
- 4 oz sugar ((1/2 cup or more as needed for coating the doughnuts))
- jam, chocolate hazelnut spread, and or whipped cream for filling, if desired ((various amounts as needed))
Preparing the Dough
The foundation of any great doughnut is a well-made dough. This is where the magic begins, and it all starts with activating the yeast.
1. Activate the Yeast: In a large mixing bowl (or the bowl of your stand mixer), combine the lukewarm water and the quick-rise yeast. Give it a gentle stir. Let it sit for about 5-10 minutes. You’ll know your yeast is alive and kicking if it gets foamy and bubbly on the surface. If nothing happens, your yeast might be old, or the water was too hot or too cold. It’s best to start over with fresh yeast and correctly tempered water. If you’re using regular dried yeast, it might take a little longer to see that vigorous foam, so be patient.
2. Combine Wet Ingredients: To the foamy yeast mixture, add the room-temperature buttermilk, the lightly beaten egg, and the melted butter. Whisk everything together until it’s well combined. Having your buttermilk at room temperature is important because it helps the dough rise evenly. Cold liquids can shock the yeast and hinder its activity.
3. Add Dry Ingredients and Mix: In a separate bowl, whisk together the all-purpose flour (or bread flour for a chewier texture), the 2 oz sugar, and the salt. Gradually add the dry ingredients to the wet ingredients in the large mixing bowl. If you’re using a stand mixer, attach the dough hook and mix on low speed until a shaggy dough forms. If you’re mixing by hand, use a sturdy spoon or spatula initially, then turn the dough out onto a lightly floured surface.
4. Knead the Dough: Continue to mix or knead the dough for about 8-10 minutes (in a stand mixer) or 10-12 minutes (by hand). The goal is a smooth, elastic dough that springs back when you lightly poke it. It should be slightly tacky but not sticking excessively to your hands or the bowl. If it’s too sticky, add a tablespoon of flour at a time. If it seems too dry, add a teaspoon of water. Proper kneading develops the gluten, which is crucial for that airy, pillowy texture we’re after.
First Rise: Letting the Dough Develop
This is where patience pays off. A good first rise is essential for flavor and texture.
5. First Proofing: Lightly grease a clean bowl with a neutral oil or cooking spray. Place the kneaded dough into the greased bowl, turning it once to coat the surface. Cover the bowl tightly with plastic wrap or a clean kitchen towel. Let the dough rise in a warm, draft-free place for 1 to 1.5 hours, or until it has doubled in size. A slightly warm oven (turned off) or near a sunny window is a good spot. The time can vary depending on the temperature of your kitchen.
Shaping and Second Rise
Once the dough has had its first, significant rise, it’s time to shape those glorious doughnuts.
6. Punch Down and Shape: Gently punch down the risen dough to release the air. Turn it out onto a lightly floured surface. You can now either roll the dough out to about ½-inch thickness and use a doughnut cutter to create your shapes, or you can simply divide the dough into small balls, flatten them slightly, and create a small indentation in the center with your finger for ring doughnuts. For filled doughnuts, you’ll want to create a slightly thicker disc, which will then be filled after frying. Arrange the shaped doughnuts on parchment-lined baking sheets, leaving a little space between them.
7. Second Proofing: Loosely cover the shaped doughnuts with plastic wrap or a light kitchen towel. Let them rise again in a warm place for another 30-45 minutes, or until they look puffy and have increased in size by about 50%. This second rise is shorter but vital for creating that characteristic light and airy texture. Be careful not to over-proof them at this stage, or they might collapse when frying.
Frying to Perfection
This is the exciting, golden-brown stage!
8. Heat the Oil: In a large, heavy-bottomed pot or Dutch oven, heat the 16 oz of olive oil over medium heat to 350-365°F (175-185°C). It’s crucial to maintain this temperature. Too low and the doughnuts will absorb too much oil and be greasy; too high and they’ll burn before cooking through. Use a candy thermometer or an instant-read thermometer to monitor the oil temperature precisely.
9. Fry the Doughnuts: Carefully lower 2-3 doughnuts at a time into the hot oil, being mindful not to overcrowd the pot. Fry for 1-2 minutes per side, or until they are beautifully golden brown. They should puff up significantly. Use a slotted spoon or spider strainer to carefully remove the doughnuts from the oil and place them on a wire rack set over a baking sheet to drain excess oil. Work in batches, ensuring the oil temperature returns to the desired range between each batch.
Glazing and Filling
The grand finale!
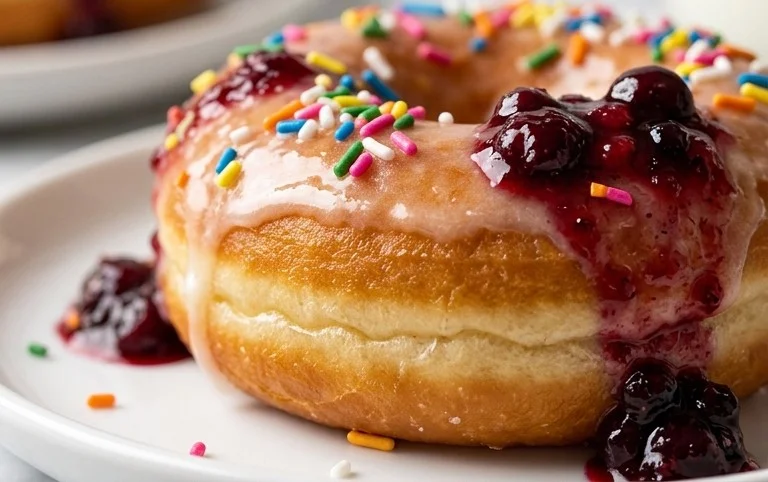
10. Coat and Fill: While the doughnuts are still warm, you can coat them. For a simple sugar coating, toss them immediately in the 4 oz of granulated sugar (you can add cinnamon for cinnamon sugar). For a glaze, you can whisk together powdered sugar with a little milk or water and dip the tops. If you’re filling them, wait until they have cooled slightly. You can use a piping bag with a long, narrow tip to inject your chosen filling (jam, chocolate hazelnut spread, or whipped cream) into the sides of the doughnuts.
Enjoy your homemade perfect yeast doughnuts while they’re fresh and warm! They are best enjoyed within a few hours of making.
Conclusion:
You’ve done it! You’ve mastered the art of creating perfect yeast doughnuts right in your own kitchen. This recipe is fantastic because it delivers that signature airy, tender crumb and a delightful chew that’s simply unmatched by store-bought alternatives. The simple, step-by-step instructions ensure even beginner bakers can achieve impressive results, filling your home with the irresistible aroma of freshly fried dough. The magic lies in patience with the proofing, allowing the yeast to work its wonders, and the gentle frying technique. These doughnuts are incredibly versatile, making them perfect for any occasion, from a special weekend breakfast to a delightful afternoon treat. We encourage you to dive in and experience the joy of creating these homemade delights!
Imagine these warm, pillowy doughnuts dusted with cinnamon sugar, glazed with a classic vanilla, or dipped in rich chocolate. They’re also wonderful served with a cup of coffee or a glass of milk. Don’t be afraid to get creative with your toppings! Think sprinkles, chopped nuts, or even a drizzle of caramel.
Frequently Asked Questions:
Why are my doughnuts not fluffy?
This is often due to insufficient proofing time. Ensure your dough has doubled in size in a warm place before frying. Overworking the dough can also lead to a denser texture. Handle the dough gently after the first rise.
Can I make these doughnuts ahead of time?
Yeast doughnuts are best enjoyed fresh, ideally within a few hours of frying. You can prepare the dough the night before and let it do its first rise in the refrigerator. Shape and fry them the next morning for the freshest flavor and texture.
How do I get my doughnuts to brown evenly?
Maintain a consistent oil temperature between 350-375°F (175-190°C). If the oil is too hot, the outside will burn before the inside is cooked. If it’s too cool, they’ll absorb too much oil and become greasy. Use a thermometer for accuracy.
Perfect Yeast Doughnuts
Classic yeast doughnuts that are light, airy, and perfect for frying and glazing or filling.
Ingredients
-
6 Tbsp water (lukewarm)
-
5 oz buttermilk (at room temperature)
-
1 egg (at room temperature)
-
2 oz butter (melted)
-
16 oz all-purpose flour
-
2 oz sugar
-
1 tsp salt
-
1 ½ tsp quick-rise yeast
-
16 oz olive oil (for frying)
-
4 oz sugar (for coating)
-
jam, chocolate hazelnut spread, and or whipped cream for filling, if desired
Instructions
-
Step 1
In a large bowl, combine lukewarm water and yeast. Let stand for 5-10 minutes until foamy. -
Step 2
Add buttermilk, egg, melted butter, 2 oz sugar, and salt to the yeast mixture. Stir to combine. -
Step 3
Gradually add the flour, mixing until a soft dough forms. Knead on a lightly floured surface for about 8-10 minutes until smooth and elastic. -
Step 4
Place the dough in a lightly greased bowl, cover, and let rise in a warm place for 1-1.5 hours, or until doubled in size. -
Step 5
Punch down the dough, roll it out to about 1/2 inch thickness, and cut out doughnuts using a cutter. Let them rest for 15-20 minutes. -
Step 6
Heat 16 oz olive oil in a deep pot or fryer to 350°F (175°C). Fry doughnuts for 1-2 minutes per side, until golden brown. -
Step 7
Remove doughnuts from oil and drain on paper towels. While still warm, coat them in 4 oz sugar or desired glaze. Fill with jam, chocolate hazelnut spread, or whipped cream if desired.
Important Information
Nutrition Facts (Per Serving)
It is important to consider this information as approximate and not to use it as definitive health advice.
Allergy Information
Please check ingredients for potential allergens and consult a health professional if in doubt.