Air Fryer Donuts From Scratch – Easy & Delicious
Air Fryer Donuts from scratch are about to become your new obsession! Forget the grocery store bakery or waiting for a special occasion. We’re talking warm, pillowy perfection, hot out of your air fryer in mere minutes. There’s something inherently magical about biting into a freshly made donut, isn’t there? That moment when the glaze slightly cracks, revealing a tender interior – it’s pure bliss. But what makes these air fryer donuts truly special is the incredible ease and speed with which you can achieve that bakery-quality taste and texture right in your own kitchen. No deep frying means less mess, less fuss, and more time to devour these delightful treats. Get ready to impress yourself and everyone you share them with!
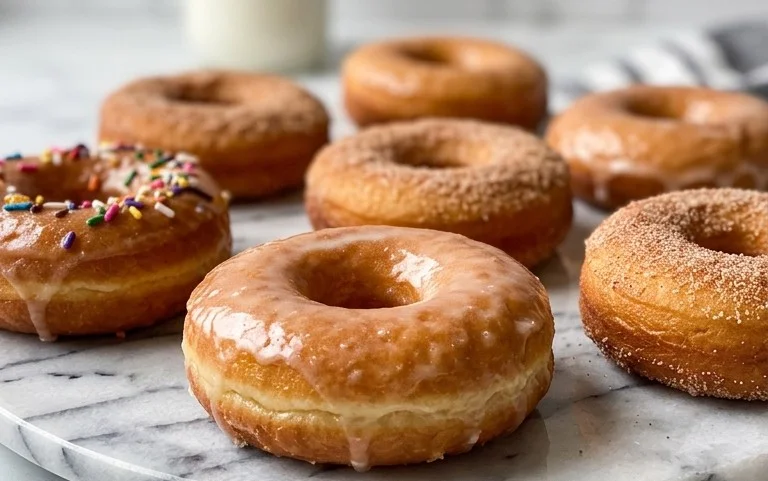
Air Fryer Donuts (from scratch)
There’s something undeniably magical about a freshly made donut. The pillowy soft dough, the sweet glaze – it’s pure bliss. While store-bought donuts are convenient, there’s a special satisfaction in creating them yourself, especially when you can achieve that perfect texture with the help of your air fryer. Forget deep-frying and all the mess; these air fryer donuts are incredibly easy to make from scratch and are surprisingly light and fluffy. This recipe is designed to guide you through every step, ensuring you get delicious, homemade donuts without the fuss. Let’s get baking!
Ingredients:
- 1/2 cup warm water (around 105-115°F or 40-46°C)
- 1/4 cup warm milk (around 105-115°F or 40-46°C)
- 2¼ teaspoons dry active yeast
- ⅓ cup granulated sugar + 1 tablespoon (divided)
- 1/4 cup unsalted butter (melted)
- 1 egg
- 1 egg yolk
- 1 teaspoon vanilla extract
- 2 1/2 cups all-purpose flour (add more as needed)
- ½ teaspoon salt
- Cooking spray
- 2 cups powdered sugar
- 1/4 cup milk
- 1 tablespoon light corn syrup
- 1½ teaspoons vanilla extract
Cooking Instructions:
Dough Preparation: Activating the Yeast
The first step to achieving light and airy donuts is to properly activate your yeast. In a large bowl, combine the warm water and warm milk. The temperature is crucial here; too hot and you’ll kill the yeast, too cold and it won’t activate. It should feel comfortably warm to the touch, like a baby’s bathwater. Sprinkle the dry active yeast over the surface of the liquid and then add 1 tablespoon of the granulated sugar. Give it a gentle stir, just enough to distribute the yeast. Let this mixture sit for about 5-10 minutes. You should see it become foamy and bubbly, indicating that your yeast is alive and ready to work its magic. If you don’t see any foam, your yeast may be old or the water wasn’t the right temperature, and you’ll need to start over with new yeast.
Dough Preparation: Mixing the Ingredients
Once your yeast is activated and foamy, it’s time to add the rest of the wet ingredients. To the yeast mixture, add the melted unsalted butter, the whole egg, the egg yolk, 1 teaspoon of vanilla extract, and the remaining 1/3 cup of granulated sugar. Whisk everything together until well combined. Now, it’s time for the flour and salt. In a separate bowl, whisk together the 2 1/2 cups of all-purpose flour and the ½ teaspoon of salt. Gradually add the dry ingredients to the wet ingredients, mixing with a wooden spoon or a stand mixer fitted with a dough hook. Continue mixing until a shaggy dough begins to form.
Dough Preparation: Kneading and First Rise
Once the dough is mostly combined, turn it out onto a lightly floured surface. Begin kneading. If you’re using a stand mixer, continue with the dough hook on medium speed. Knead for about 8-10 minutes, or until the dough is smooth, elastic, and no longer sticky. You may need to add a little more flour, a tablespoon at a time, if the dough is too wet. Be careful not to add too much, as this can make the donuts tough. The dough should spring back slowly when you poke it with your finger. Lightly grease a clean bowl with cooking spray or a little oil. Place the kneaded dough into the bowl, turning it to coat all sides. Cover the bowl tightly with plastic wrap or a clean kitchen towel and let it rise in a warm place for about 1 to 1.5 hours, or until it has doubled in size. This “proofing” stage is essential for developing that characteristic fluffy texture.
Shaping and Second Rise: Creating the Donut Rings
Once your dough has doubled in size, gently punch it down to release the air. Turn the dough out onto a lightly floured surface and pat it into a disc about ½ inch thick. You can use a donut cutter, but if you don’t have one, you can use two round cookie cutters of different sizes. A larger one (about 3 inches) for the outer circle and a smaller one (about 1 inch) for the inner hole. If you don’t have cutters, you can also roll the dough into a log and cut it into individual donut shapes, then use your finger or a small knife to create the hole. Arrange the shaped donuts on a baking sheet lined with parchment paper, ensuring they have a little space between them. Lightly cover them with plastic wrap and let them rise for another 30-45 minutes, or until they are puffy. This second rise is important for getting those airy interiors.
Air Frying and Glazing: The Sweet Finish
Preheat your air fryer to 350°F (175°C). Lightly grease your air fryer basket with cooking spray to prevent sticking. Carefully place 1-2 donuts in the air fryer basket at a time, ensuring not to overcrowd it. You may need to cook them in batches. Air fry for 3-5 minutes per side, or until golden brown and cooked through. The exact time will depend on your air fryer model and the size of your donuts. Keep a close eye on them as they cook quickly. While the donuts are cooking, prepare the glaze. In a medium bowl, whisk together the powdered sugar, ¼ cup milk, 1 tablespoon light corn syrup, and 1½ teaspoons vanilla extract until smooth and lump-free. Add more milk, a teaspoon at a time, if the glaze is too thick, or more powdered sugar if it’s too thin. Once the donuts are done, let them cool on a wire rack for a few minutes before dipping them into the glaze, coating both sides. Place the glazed donuts back on the wire rack to allow the glaze to set. Enjoy your delicious, homemade air fryer donuts!
Conclusion:
As you can see, creating delicious, homemade air fryer donuts from scratch is not only achievable but incredibly rewarding. This recipe truly shines because it offers a healthier, quicker alternative to traditional fried donuts without sacrificing that delightful taste and texture. The air fryer delivers a wonderfully crispy exterior and a soft, fluffy interior, making these donuts a guaranteed hit for any occasion, from a special weekend breakfast to a delightful afternoon treat.
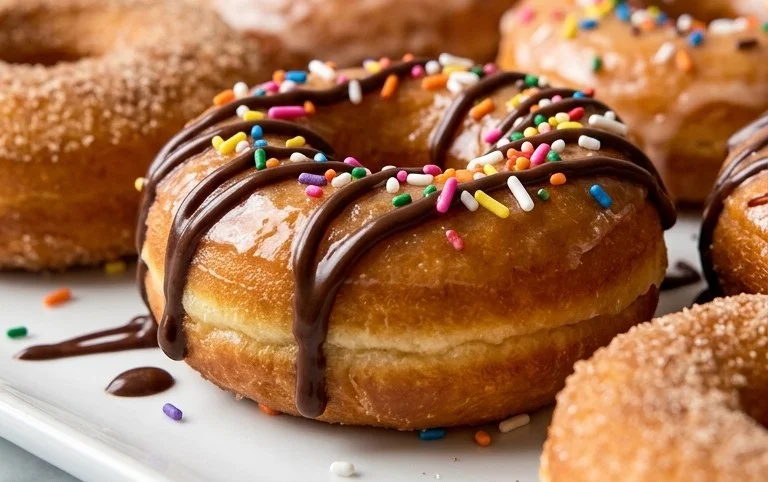
I highly encourage you to gather your ingredients and give these air fryer donuts a try. Imagine the satisfaction of pulling perfectly golden rings from your air fryer, ready to be glazed or topped with your favorite flavors! Don’t be afraid to get creative with toppings – think classic chocolate glaze, cinnamon sugar, a vibrant berry drizzle, or even a sprinkle of powdered sugar. They’re also fantastic served warm with a cup of coffee or a glass of milk.
Remember, the beauty of making donuts from scratch is the ability to customize them to your exact liking. Experiment with different extracts in the dough, try infusing your glaze with citrus zest, or even adding a pinch of nutmeg for warmth. You’ll find that mastering these air fryer donuts opens up a world of sweet possibilities. Happy baking!
Frequently Asked Questions:
Can I make these donuts ahead of time?
While air fryer donuts are best enjoyed fresh for optimal texture, you can prepare the dough a day in advance and store it covered in the refrigerator. Let it come to room temperature for about 30 minutes before proceeding with shaping and air frying.
What’s the best way to store leftover donuts?
For the best results, store any leftover air fryer donuts in an airtight container at room temperature for up to two days. They might lose a little of their initial crispiness over time, but they will still be delicious.
Air Fryer Donuts (from scratch)
Delicious and easy air fryer donuts made from scratch, perfect for a sweet treat.
Ingredients
-
1/2 cup warm water
-
1/4 cup warm milk
-
2¼ teaspoons dry active yeast
-
⅓ cup granulated sugar
-
¼ cup unsalted butter (melted)
-
1 egg
-
1 egg yolk
-
1 teaspoon vanilla extract
-
2 1/2 cups all-purpose flour
-
½ teaspoon salt
-
Cooking spray
-
2 cups powdered sugar
-
¼ cup milk
-
1 tablespoon light corn syrup
-
1½ teaspoons vanilla extract
Instructions
-
Step 1
In a large bowl, combine warm water, warm milk, yeast, and 1 tablespoon of granulated sugar. Let stand for 5-10 minutes until foamy. -
Step 2
Add the remaining ⅓ cup granulated sugar, melted butter, egg, egg yolk, and 1 teaspoon vanilla extract to the yeast mixture. Mix well. -
Step 3
Gradually add the flour and salt to the wet ingredients. Mix until a soft dough forms. Knead for 5-7 minutes until smooth and elastic. Add more flour, a tablespoon at a time, if the dough is too sticky. -
Step 4
Place the dough in a greased bowl, cover, and let rise in a warm place for 1 hour, or until doubled in size. -
Step 5
Punch down the dough and roll it out on a lightly floured surface to about ½ inch thickness. Cut out donut shapes using a donut cutter or two different sized round cutters. -
Step 6
Lightly spray the air fryer basket with cooking spray. Place donuts in a single layer in the air fryer basket, ensuring they don’t touch. Cook at 350°F (175°C) for 3-5 minutes per side, until golden brown. -
Step 7
While donuts are cooking, prepare the glaze by whisking together powdered sugar, ¼ cup milk, corn syrup, and 1½ teaspoons vanilla extract until smooth. -
Step 8
Dip the warm donuts into the glaze, letting any excess drip off. Place on a wire rack to set.
Important Information
Nutrition Facts (Per Serving)
It is important to consider this information as approximate and not to use it as definitive health advice.
Allergy Information
Please check ingredients for potential allergens and consult a health professional if in doubt.