Classic Scones Recipe-Delightful Breakfast & Tea Treat
Classic scones are more than just a baked good; they’re a warm hug, a delightful pause in a busy day, and a cornerstone of comforting traditions. Who can resist the simple elegance of a scone, perfectly golden on the outside, tender and crumbly within? There’s a reason classic scones have stood the test of time, gracing tea tables and breakfast spreads for generations. It’s that effortless charm, the satisfying texture that yields to the gentlest press, and the versatility that allows them to be dressed up with clotted cream and jam or enjoyed in their pure, unadorned glory. What makes them truly special is their ability to transport us – to a cozy countryside cottage, a bustling bakery, or simply a moment of pure, unadulterated bliss. Today, we’re diving into the heart of what makes these classic scones so beloved, and I’m going to share my tried-and-true recipe that will bring this timeless delight right into your own kitchen.
Why You’ll Love This Recipe
A Taste of Tradition, Made Easy
Classic Scones
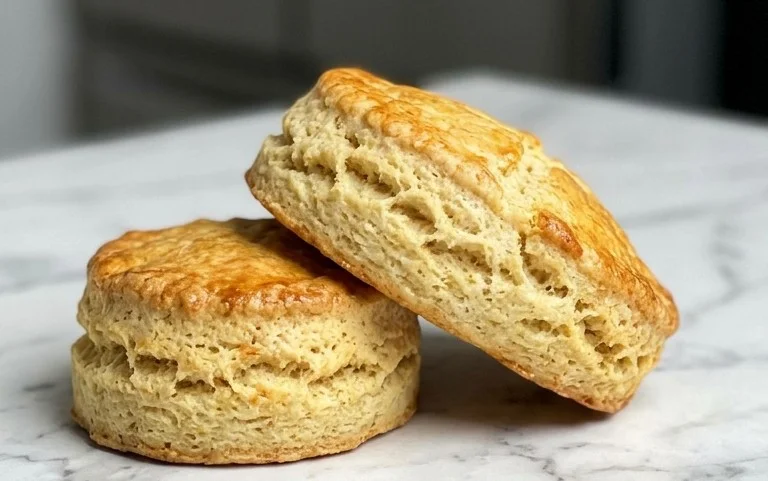
There’s something undeniably comforting and elegant about a perfectly baked scone. Whether enjoyed with a dollop of clotted cream and jam for a traditional afternoon tea, or simply with a smear of butter for a delightful breakfast treat, classic scones are a timeless baking triumph. The beauty of a good scone lies in its delicate crumb, slightly crisp exterior, and subtle sweetness, all achieved with simple, wholesome ingredients. Today, we’re going to unlock the secrets to creating these delightful pastries in your own kitchen. Forget those dry, crumbly disappointments; we’re aiming for tender perfection, every single time. The key to success lies in understanding the role of each ingredient and employing a few simple techniques that elevate the humble scone to something truly special.
Ingredients:
- 3 cups (381 grams) all-purpose flour, (measured correctly)
- 1/3 cup (66 grams) granulated sugar
- 1 teaspoon fine sea salt
- 1 tablespoon baking powder
- 1/2 teaspoon baking soda
- 1 1/2 sticks (170 grams) unsalted butter, (cold and cubed)
- 1 cup (237 grams) buttermilk
- 2 large eggs, (divided)
- 1 teaspoon vanilla extract
- Coarse sugar, (for topping)
The Art of Dough Preparation
The foundation of any great scone is a properly prepared dough. We’re not looking for a smooth, elastic dough like you would make for bread. Instead, a scone dough should be slightly shaggy and best handled with a light touch. This is crucial for achieving that desirable tender crumb. Overworking the dough will develop the gluten too much, resulting in tough scones.
Crafting the Perfect Crumb: Step-by-Step Instructions
1. Dry Ingredients Assembly: In a large mixing bowl, whisk together the 3 cups of all-purpose flour, 1/3 cup of granulated sugar, 1 teaspoon of fine sea salt, 1 tablespoon of baking powder, and 1/2 teaspoon of baking soda. Ensuring these dry ingredients are evenly distributed is the first step towards consistent flavor and leavening. Whisking aerates the flour and prevents clumps, which can lead to uneven pockets in your finished scones.
2. Incorporating the Cold Butter: This is perhaps the most critical step for achieving a tender and flaky scone. Add the 1 1/2 sticks of cold, cubed unsalted butter to the dry ingredients. Using a pastry blender, your fingertips, or even a food processor on a pulse setting, work the butter into the flour mixture until it resembles coarse crumbs with some pea-sized pieces of butter remaining. These butter pieces are what will melt during baking, creating steam and leaving behind pockets of air, resulting in that signature flaky texture. It’s important that the butter remains cold throughout this process; if it starts to soften, your scones will be denser. You can even pop the bowl and the butter back in the fridge for a few minutes if your kitchen is warm.
3. Bringing it Together with Wet Ingredients: In a separate small bowl, whisk together 1 cup of buttermilk, 1 of the large eggs (save the other for the egg wash), and 1 teaspoon of vanilla extract. Make a well in the center of your dry ingredients and pour in the wet mixture. Gently mix with a spatula or wooden spoon until just combined. Be careful not to overmix! A few dry spots are perfectly fine at this stage. The buttermilk’s acidity reacts with the baking soda, contributing to the lift and tenderness of the scones. The vanilla extract adds a subtle, warm aroma that complements the other flavors beautifully.
4. Forming and Shaping the Dough: Turn the slightly shaggy dough out onto a lightly floured surface. Gently pat or fold the dough a few times until it just comes together. The less you handle it, the better. Aim for a thickness of about 3/4 to 1 inch. You can then use a round cookie cutter (about 2 to 2.5 inches in diameter) to cut out your scones. Press straight down without twisting; twisting can seal the edges and prevent an even rise. Re-gather the scraps gently and repeat the process, but try to handle them as little as possible for the best texture. Alternatively, you can pat the dough into a round disc and cut it into wedges, much like a pizza.
5. Baking to Golden Perfection: Preheat your oven to 400°F (200°C). Line a baking sheet with parchment paper. Arrange the shaped scones on the prepared baking sheet, leaving a little space between them. In a small bowl, whisk the remaining egg with a tablespoon of water to create an egg wash. Brush the tops of the scones generously with the egg wash. This will give them a beautiful golden sheen and help the coarse sugar adhere. Sprinkle the tops liberally with coarse sugar for a delightful crunch and sparkle. Bake for 15-20 minutes, or until the scones are risen, golden brown, and a toothpick inserted into the center comes out clean.
Allow your freshly baked classic scones to cool on a wire rack for a few minutes before serving. They are best enjoyed warm, when their delicate crumb and buttery flavor are at their peak. Serve them with your favorite accompaniments – clotted cream, strawberry jam, or even just a simple pat of good quality butter. Enjoy this simple pleasure!
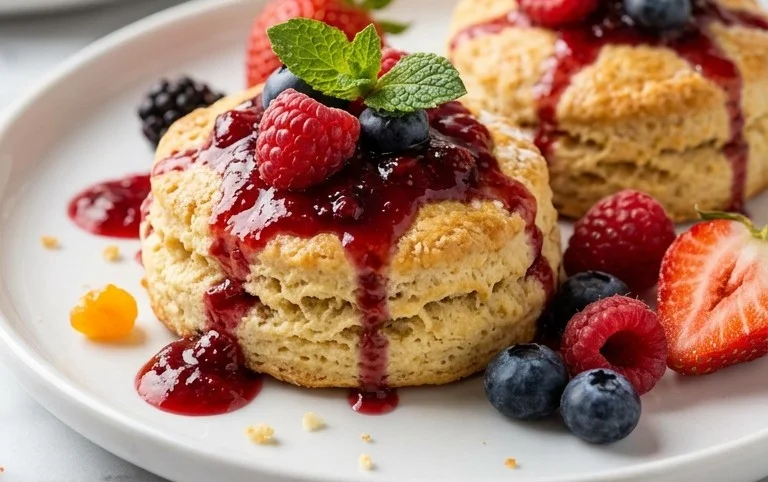
Conclusion:
There you have it – the guide to baking truly classic scones! This recipe is a winner because it delivers perfectly tender, slightly crumbly scones with a beautiful rise every time. They’re wonderfully versatile, making them ideal for any occasion, from a lazy weekend brunch to a sophisticated afternoon tea. I truly hope you’ll give this recipe a try; the aroma alone as they bake is incredibly rewarding, and the taste is even better.
Enjoy your freshly baked scones plain, or elevate them with a dollop of clotted cream and your favourite jam. For a touch of sweetness, a drizzle of honey or a sprinkle of icing sugar works wonders. Don’t be afraid to get creative with variations! Consider adding a handful of sultanas or currants for a fruity twist, or perhaps some finely grated lemon zest for a burst of citrus. Cheese scones are another popular option, perfect for a savoury snack.
Baking these classic scones is a simple joy, and I can’t wait for you to experience the satisfaction of pulling a golden batch from your oven. Happy baking!
Frequently Asked Questions:
Why are my scones tough?
Tough scones often result from overmixing the dough or overworking it when shaping. Once the wet and dry ingredients are just combined, stop mixing. Be gentle when patting or rolling the dough; avoid kneading it like bread. Overhandling develops the gluten too much, leading to a chewy texture instead of a tender crumb.
Can I make the dough ahead of time?
Yes, you can prepare the scone dough up to a day in advance. Mix the dry ingredients and cut in the butter. Then, add the wet ingredients until just combined. Wrap the dough tightly in plastic wrap and refrigerate. When you’re ready to bake, turn the chilled dough onto a lightly floured surface, pat it out, cut your scones, and bake as usual. Chilling the dough can actually improve the texture!
Classic Scones
Flaky and tender classic scones, perfect for breakfast or afternoon tea.
Ingredients
-
3 cups (381 grams) all-purpose flour
-
1/3 cup (66 grams) granulated sugar
-
1 teaspoon fine sea salt
-
1 tablespoon baking powder
-
1/2 teaspoon baking soda
-
1 1/2 sticks (170 grams) unsalted butter, cold and cubed
-
1 cup (237 grams) buttermilk
-
2 large eggs, divided
-
1 teaspoon vanilla extract
-
Coarse sugar, for topping
Instructions
-
Step 1
Preheat oven to 400°F (200°C). Line a baking sheet with parchment paper. -
Step 2
In a large bowl, whisk together the flour, sugar, salt, baking powder, and baking soda. -
Step 3
Cut in the cold butter using a pastry blender or your fingertips until the mixture resembles coarse crumbs. -
Step 4
In a separate bowl, whisk together the buttermilk, one large egg (reserve the other for brushing), and vanilla extract. -
Step 5
Pour the wet ingredients into the dry ingredients and mix until just combined. Do not overmix. -
Step 6
Turn the dough out onto a lightly floured surface and gently knead a few times until it just comes together. Pat the dough into a 1-inch thick round. -
Step 7
Cut the dough into 12 wedges. Place the scones on the prepared baking sheet. -
Step 8
Brush the tops of the scones with the remaining beaten egg and sprinkle generously with coarse sugar. -
Step 9
Bake for 12-15 minutes, or until golden brown and cooked through.
Important Information
Nutrition Facts (Per Serving)
It is important to consider this information as approximate and not to use it as definitive health advice.
Allergy Information
Please check ingredients for potential allergens and consult a health professional if in doubt.